Tuesday, June 28, 2011

Squadron Encore Models


 The Sopwith Camel
The other day while visiting our local hobby shop, I found some kits in plastic bags.  Marked on the package was "Squadron Encore Models". There were at least three or four different models as I recall and I purchased two of them as the price was somewhat attractive at $9.95 each. The packaging does not allow one to see much of the contents inside as on one side of the bag has a color drawing of the aircraft inside. The model itself is inclosed in the instruction folder which covers the other side of the bag.  So needing something to do over the weekend, I took two models home, they were the Sopwith Camel and Albatros D.V in 1/72 scale.
Upon opening them I discovered they are Roden kits from the Ukraine. They appear to be early molds as the have a fair amount of flash and are somewhat of a poor fit.  Having several years of modeling experience behind me, these two kits only presented a little challenge.  I begin with the Sopwith Camel and it was finished in two days.  Some of the points that need to addressed to aide in construction are:
1.  Enlarge all holes for wing struts.
2.  Likewise with the landing gear.
3.  I found the joy stick and rudder pedal are not visible, so I omitted them.
4.  Some extra care is needed on the rear rudder and stabilizer.
5.  Sand off all stubs on both wings as they make it almost impossible to apply the decals.
6.  Great care is needed when applying the decals.

Albatros D. V
Likewise the Albatros presents its own unique set of problems as follows:
1.  The wings are separate pieces and are butt joined and glued. I used "Super-Glue".
2.  Again enlarge all strut locations.
3.  The struts are very weak and care is needed when glueing the wings to the struts.
4.  Same holds true to the under carriage.
5.  The German Iron Crosses are separate pieces white and black.
6.  Great care is needed when applying decals as they are very thin.
The Albatros also took two days to build.  The rigging was done with paint brush hairs in black from a 3 inch cheap brush purchased at our local hardware store. When one views each model at normal viewing distance, they look quite presentable.

Thursday, June 23, 2011

Eduard Bf-108

In the past, Eduard kits were not one of my first choices in looking for something to build.  Eduard model kits are made in the Czech Republic and mostly in 1/48 scale.  They have made 1/72 and 1/32 scale models as well.  I guess their claim to fame is in photo etch parts for many other kits on the market. I first discovered them while looking for canopy mask.  So I googled mask and came up with the Eduard Home page.  www.eduard.com  Soon I found myself hooked on the web pages for there is so much information and lots of other goodies to discover.  This was followed up by a visit to our local hobby shop in search of some Eduard kits.  I found a few; what Eduard calls "Weekend Editions".  They were World War I types and although very nicely molded, there were just to many fine parts and some almost impossible to remove from the tree without breaking them.  So on to Ebay searching for Eduard Kits.  To my surprise, I found a lot and many were priced below Eduards suggested retail price.  Kit Number 8054 is the Bf-108 commonly called the Taifun.  This kit came with colored photo etched parts and a mask for the canopy.  Price was very attractive and I ordered it from DeCarlo's Jewerly, in IA.
What a surprise to find many of the super fine and not necessary parts; were in the kit and if one chose, they could go blind trying to attach them and some of the super small photo etch parts that would not be seen once the model was assembled.
The cockpit with the seat belts in place.
The Bf-108 assembled well and and I did struggle a little with the seat belts, but what a difference they make especially when the canopy area is so large and the inside so visible.  Today problems seem to be buying Tamiya Paints.  Fortunately I had all the colors I needed. One of the things I have been wanting to try is painting the panel lines in black to high-lite them.  I read several articles on how to accomplish this and I decided to go with the lighter fluid method.  Basically it goes like this.  Paint your model with acrylics, seal with a clear gloss and let dry completely.  i.e. I should have left my model dry a lot longer then I did.  Lesson learned!  When you are ready, dilute enamel black with lighter fluid so that it becomes sort of a wash.  Then carefully paint over all panel lines on the model with the wash.  You don't want to get sloppy or you will end up with a larger mess to correct.  Once this is dry, put lighter fluid on a clean rag on your finger tip and remove the over flow off the model.  It works great and the lighter fluid will not attack either the acrylic or the enamel paint.  The key is the gloss coat to protect the base paint.
Finished

Notice one can still see inside the canopy.
This done and decals applied the model looks quite well.  So I can say Eduard models are well worth looking into, the colored photo etch is a nice added touch especially in the seat belts.  The parts fit very well and the canopy mask is a real blessing.  Finally the black panel lines adds a real demential look to finished model.

Tuesday, May 3, 2011

Revell's Arado AR-196 Floatplane

Revell's Ar-196 - Wings Folded
The new Revell's 1/32 Scale Arado AR-196 Floatplane can be assembled either with the wings extended for flight or folded for storage aboard a ship.  I opted to make my model with the wings folded as she would be when stored on any of several German Warships such as the Graf Spee or Bismarck.  Instructions for each style are clearly marked on the instruction sheet.  The Arado was the main-stay aircraft used in almost every front during World War 2.
I used the prop blade to cover the machine gun opening.
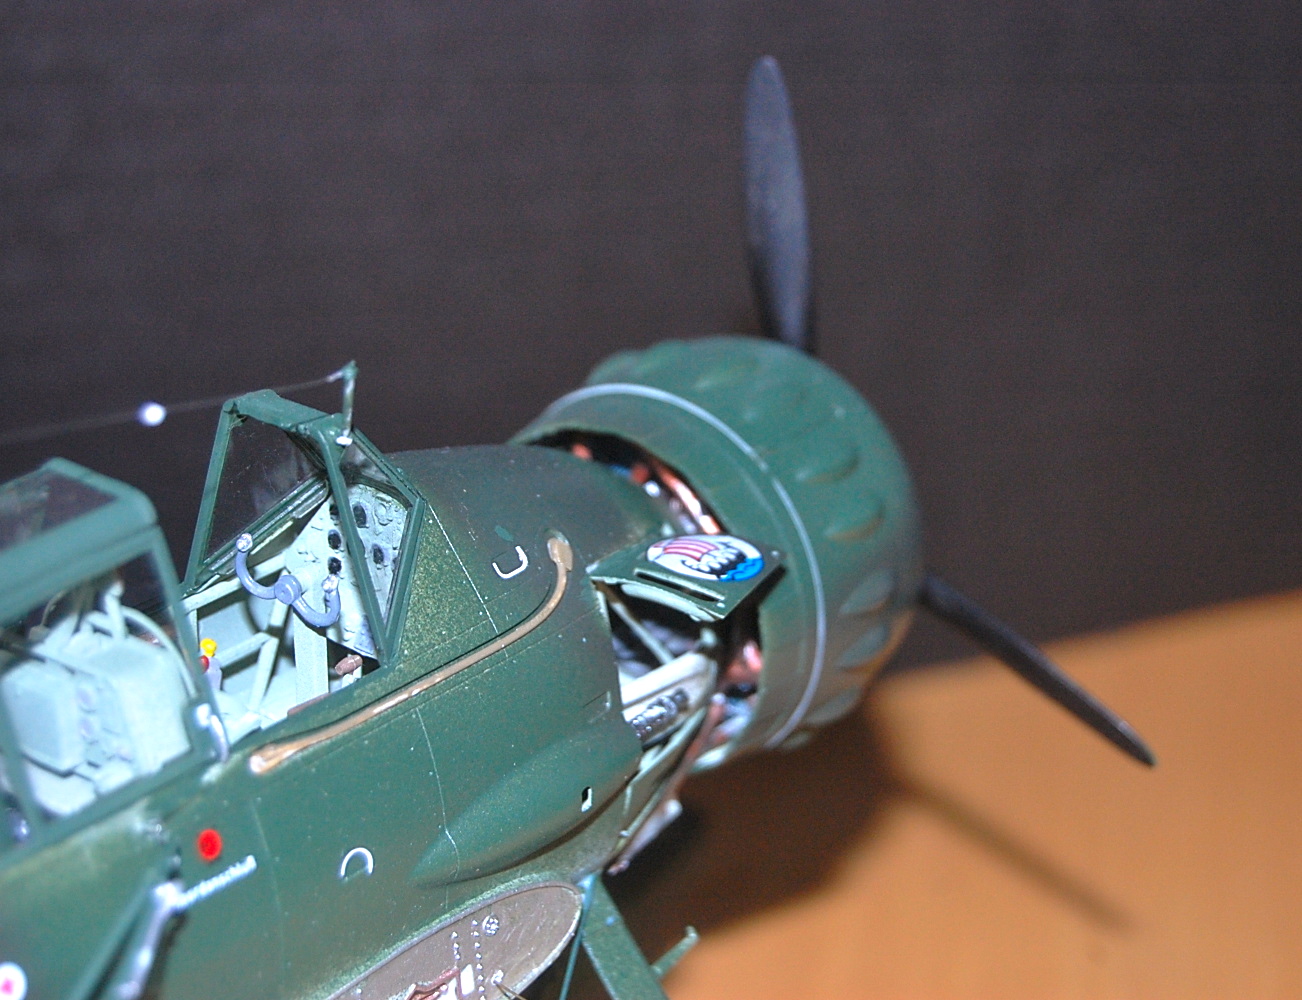
The Arado kit comes from Revell Germany and like the S-100 (reviewed on an earlier Blog) is a suburb model with many fine detailed parts.  A good example is the gunners seat which slides on the tracks as it should; and the back rest can be positioned for seating forward or facing back to the machine gun.  Molded in light gray, I found no flash and the parts fit right on.  I would suggest one studies the instruction closely when it comes to assembling the engine.  I thought I had it perfect, but when it came time to assemble the cowl the opening for the machine gun would not line up correctly.  Somewhere during assembly I screwed up. 

If I were to mentioned a negative side, I would say the canopy was the down fall.  It comes in separate pieces and has to be glued together.  It became for me at least a little difficult to hold the correct angle to fit the cockpit opening. When trying to  position the center and aft section they did not seem to fit like the rest of the model did.  I am hoping to build Revell's 1/32 scale Ju-88 next, but If the price proves to be to high for now, I may build another Arado, this time with the wings extended for flight.

Close up of the cockpit, this kit has a lot of details and could be enhanced more.  There is plenty of room for a super detailing.


Saturday, March 26, 2011

Revell's S-100 Schnellboot

The completed model
I have not really built a plastic model lately that I found enjoyable until now.
While browsing our local hobby shop, I came across this Revell 1/72 Scale German S-100 Schnellboot.  What made this all the more enjoyable; the price of the model was on sale, almost half the original cost.

From out of the box, the hull fit well and the deck almost snapped in place.  Parts were easily removed from the trees and the fit was right on.  A minimum amount of sanding and even less body putty was needed.  My only negative comment lies in the fact that Revell chooses not to include other paint manufactures color numbers.  I use Tamiya paints and guessed at what colors would best matched Revel's color numbers.  They do give some basic ideas as "Sea Gray, Medium Gray, Steel" etc.

The Schnellboots were used throughout the war and were very successful in destroying a good many ships.  More commonly known as E-Boats, the S-100 series was the final version and several modifications were made to the all the boats during the war years including up- grade guns and mine laying versions.  Many boats survived the end of the war and became prized war booty to many nations.

 This Schnellboot is a German produced kit and can easily be identified by the green box it comes in.  If these German made kits are an indication of the quality in these models, I look forward to building more German Revell models.  I would like to get the Gato Class U. S. Submarine in the same scale as this S-100 model (1/72), but the cost is over $100.00 and that almost puts it out of sight except that I can put it on lay-a-way which our shop offers.

The bow shows a lot of detail that is just not in many other kits.

Here is a top view, note the ropes holding the rafts to the engine exhaust.
On the other side of the coin, is Revell's PT-109.  This kit is quite old and was made by Revell when they produced kits in California.  Molded in dark green plastic. this kit will require much work to even come close to the the quality of the Schnellboot. Many details are molded right into the model and not nearly as detailed. These American produced kits come in the usual off white colored boxes often seen in the "Big Box Stores."

Sunday, January 30, 2011

St. Michael's Basilica by Anker

 The Basilica 

I have waited a while to get this model from Anker.  If I understand correctly, the people at Anker intend to produce stone models of historical buildings in the future with this being the first.
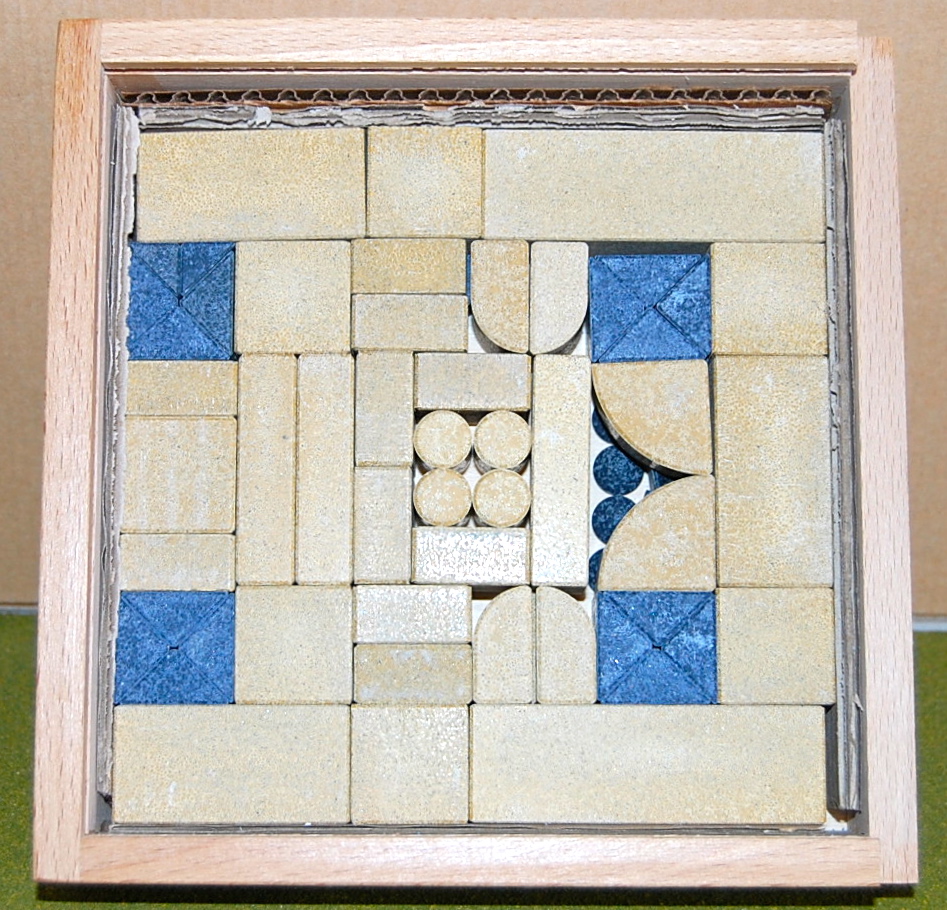
The stones inside
The blocks come in the usual wooden box measuring 7 1/4 inches square and contain in this case 74 stones. This represents what seems to be a new approach in marketing as the packaging is quite attractive.  Inside the box, you will find a booklet describing the Basilica in German and English. At the end of the booklet are the building diagrams which are done in the 3D style as well as the flat plan style. Also on the rear cover is the box layout instead of it being glued to the underside of the box lid. My model came from the ToyHouse, which is now owned by Jon Stolz and a thanks for getting to me by my birthday.
Once unpacked and inspected, building the model took about 15 minutes and although not something one will want to build over and over again, it would make a nice diversion for your grand kids to play with.  Or you might just incorporate the stones into your collection, as their seems to be a few new stones that I don't have in my collection such as stones 1557 (small 1/4 round) or stones 1558 (small cone).
About half built
Finished model with booklet in the background

Wednesday, December 29, 2010

An Unknown Anker Set


I came across this set and two other sets
while browsing the Anker Home Web site.  I found them listed under the title FrÓ§belgaben on the left side of the page.  I do not know the purpose these were designed, but they are cute and one can always use more stones no matter what size.  I was surprised to find they were available practically in my own back yard.
This set came from the "Red Hen" Books and Toys:  http://store.redhentoys.com/storefront.aspx                   in Grand Rapids, Michigan.  As I live very near Lake St. Clair in Michigan; Grand Rapids in on the other side of the State about a 3 hour drive from my home.
FrÓ§belgabe Nr. 3 contains eight 25 x 25 x 25 mm size stones. or in Anker language stone number 1.

A cross
Simple design
 Using pictures supplied on Anker's web page; these two models were made using all eight stones for each model.  Although I may never used theses stones for stand alone models in the future, I certainly will be adding them to my over all collection.  Eight additional stones are always welcome.

Thursday, December 23, 2010

A Section of the Great China Wall

From Paper Toys :http//www.papertoys.com  comes this free paper model of a section of the great wall of China.  This model as with the previous posted model was reduced to fit on a 4 x 6 piece of card stock.  The Model consist of only tens parts and was completed in about an hour.  Just a little something while we wait for Santa to arrive tomorrow.  Christmas Eve dinner is ready and we are thawing out our roast for Christmas Day dinner.  As the poem goes; 'the stockings were by the chimney with care, in hopes St. Nick would soon be there.'

So I wish each and every one a very Merry Holiday and a Joyous New Year.
 
Google